How to add a Custom Watermark to all of your YouTube videos (in <15 minutes)
Adding a custom watermark to your YouTube videos is way easier than you think.
(Skip to step 5 if you already have a logo file with a transparent background)
Step 1: Go to Canva and open a new project that’s 1080×1080 pixels.
*You will need a Canva Pro account to access the background remover feature. Remember, you can get Canva Pro for free as a nonprofit!*
Step 2: Upload your logo file (Uploads tab in the left menu) and click on it to place it on your page. Use the corner toggle to resize it to fill the page.
Step 3: With the image selected, go to Edit image > BG Remover. Let it work its magic.
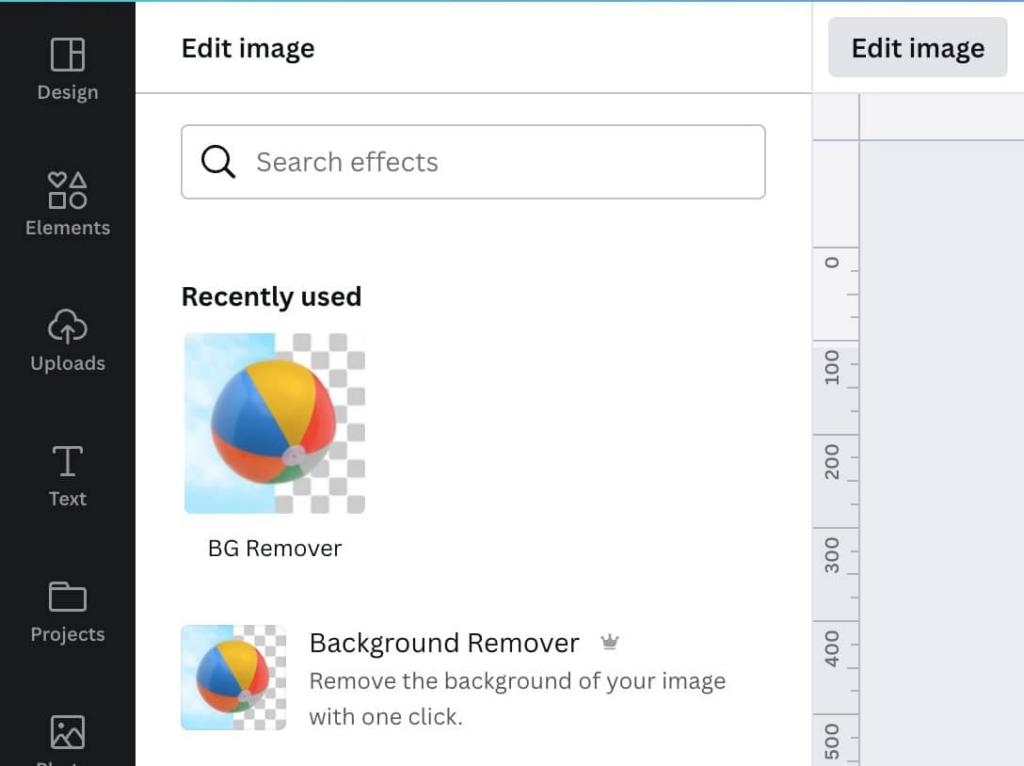
Step 3.5: If you’d like your watermark to be a bit transparent (you can see the video through the logo), you can select your image and look for the little checkerboard button. Drop the transparency to around 75%.

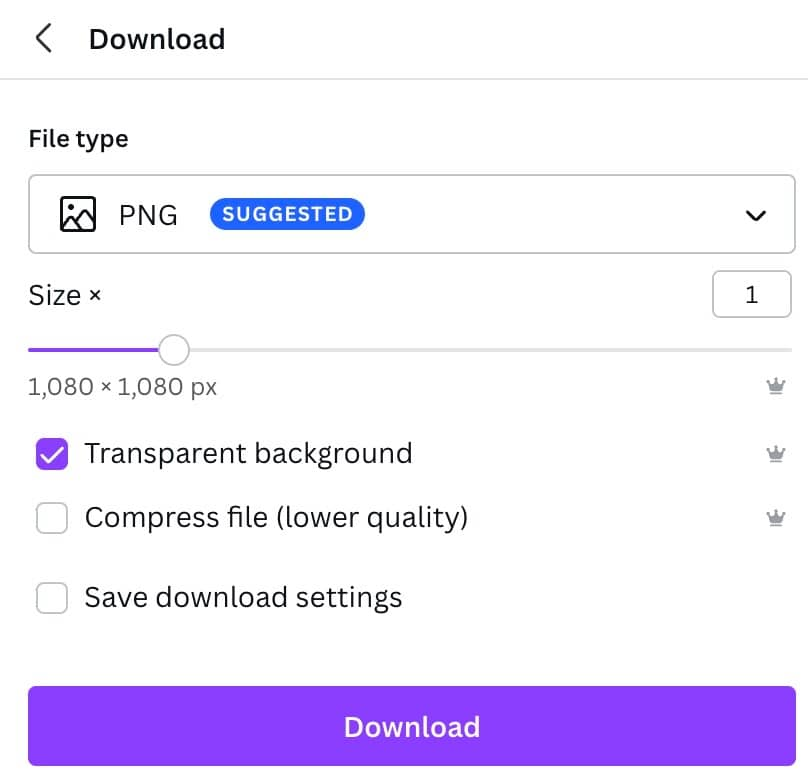
Step 4: Download the image as a PNG with a Transparent Background.
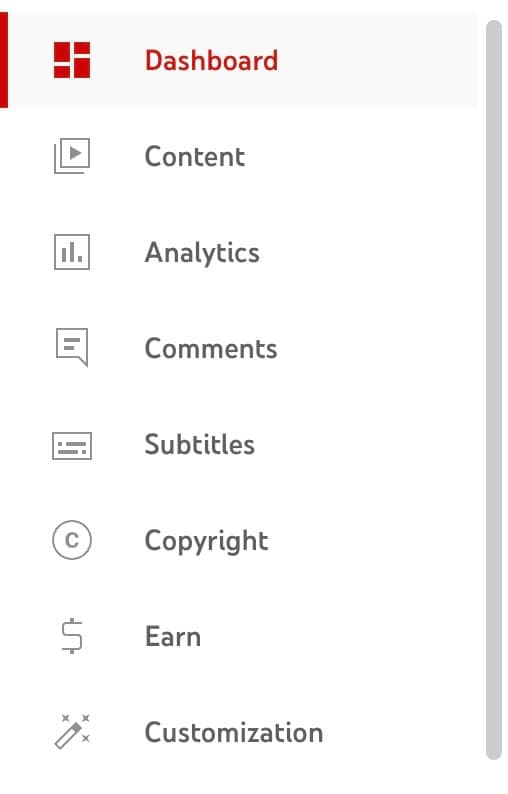
Step 5: Go to your YouTube Creator Studio.
Step 6: In the left menu, go to Customization.
Step 7: In the top menu, go to Branding. Scroll down.
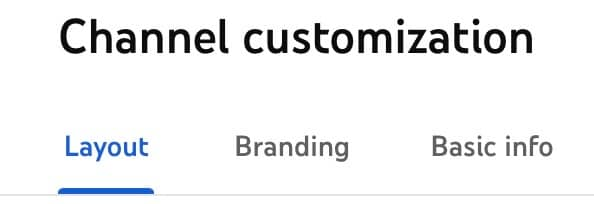
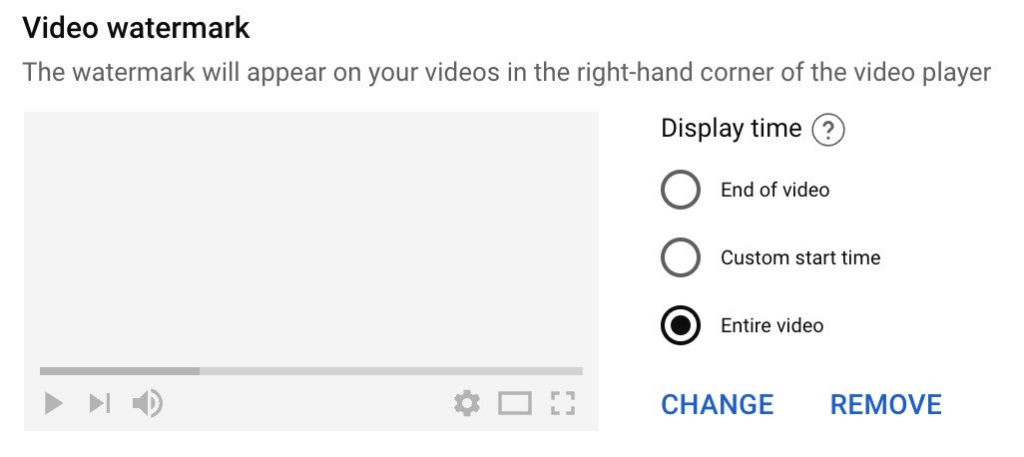
Step 8: Select or change your logo file and upload! I like to set Display time to Entire video.
Don’t have Canva Pro or a transparent logo file? Reply with your logo (or even just your website) and I’ll make you a PNG file to use on YouTube.
Then, you should immediately go apply for Canva for Nonprofits. 😉
